Taming GitLab's Google Tag Manager container

When I joined GitLab, there were layers, upon layers, upon layers of tags and triggers in our Google Tag Manager (GTM) container. One of GitLab's core values is Iteration, and that value leads us to pursue minimum viable change. On our website, these small changes often broke our ability to measure success. When we discovered something broken in GTM, it was easy to fix it now and worry about clean up later.
This led to our container becoming something resembling a digital world historical site. Solving basic tracking issues required a working knowledge of the specific ins and outs. Anyone new needed to spend lots of time digging around to get oriented. After several months of learning our container and what we wanted to track, I started work on a system to tame our Google Tag Manager at GitLab.
What is Google Tag Manager?
If you work in digital marketing you probably know what Google Tag Manager does, allow me to explain what it does for my friends who might not know. (Hi mom!)
Google Tag Manager is a marketing tool designed to simplify tag deployment to your website. You add a couple of snippets of GTM code to your site, and it gives you the ability to add other tags with a container, without having to add new tags to your site's code. GTM also gives you the ability to create triggers to fire your tags exactly when you need them.
For example, you can fire your Google Analytics code snippet through GTM and tell GTM when to fire Google Analytics. You might think, "Why is it simpler to add one set of tags to fire Google Analytics? I can add the Google Analytics snippet to my website."
Yes, the initial setup for Google Analytics is straightforward. But some advanced features take tons of time to set up and test. Events are particularly useful and time-consuming, and with GTM you can set event categories, actions, and labels to help contextualize activity when reviewing your site's performance without having to add all of that extra code yourself.
All the tags in your container fire asynchronously, which means you shouldn't have scripts slowing down your page speed.
There are many tags built-in, and you can add custom HTML or images as needed.
Planning a better container
Part of what made it tricky to manage our container were event components. Some events were tracked more than once with different values for the same component.
One call to action click could fire two events with a different event category, event action, or event label. Our components even mixed types with some categories including click when click fits better in actions.
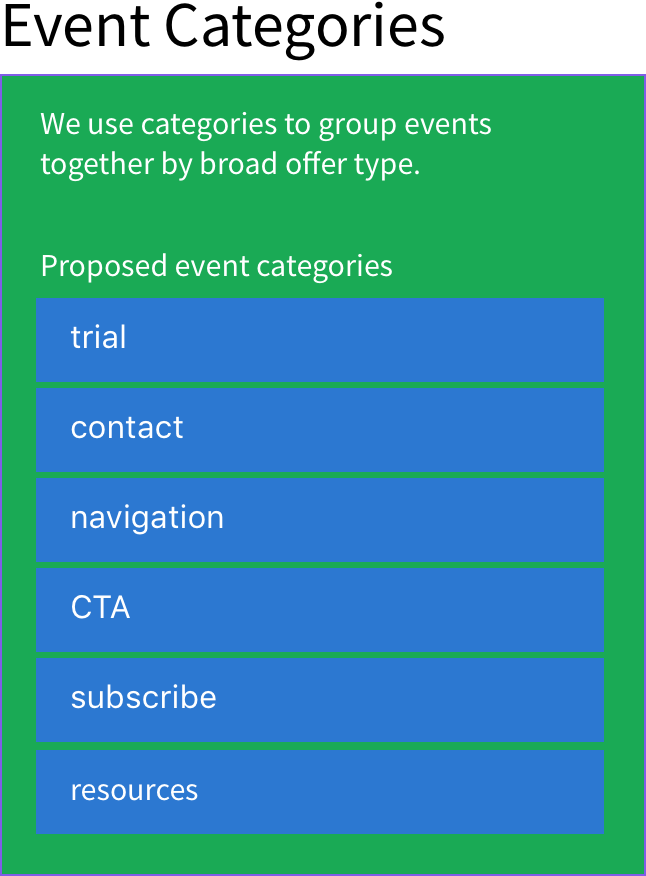
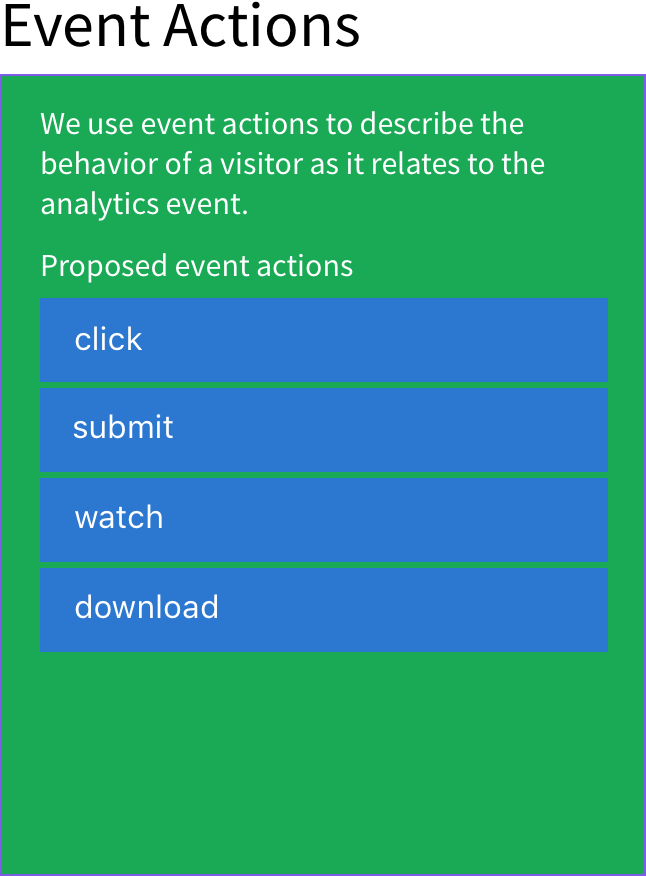
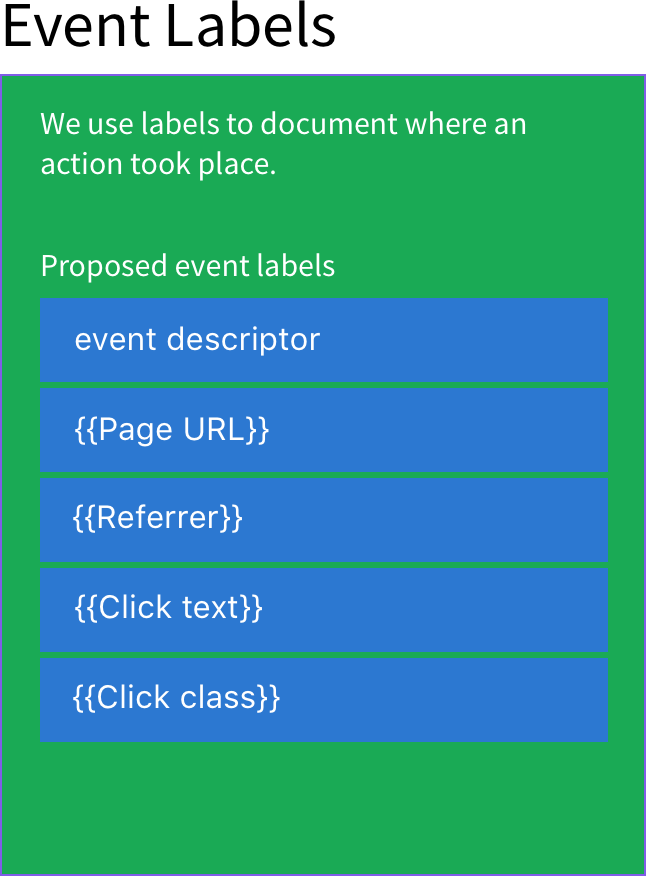
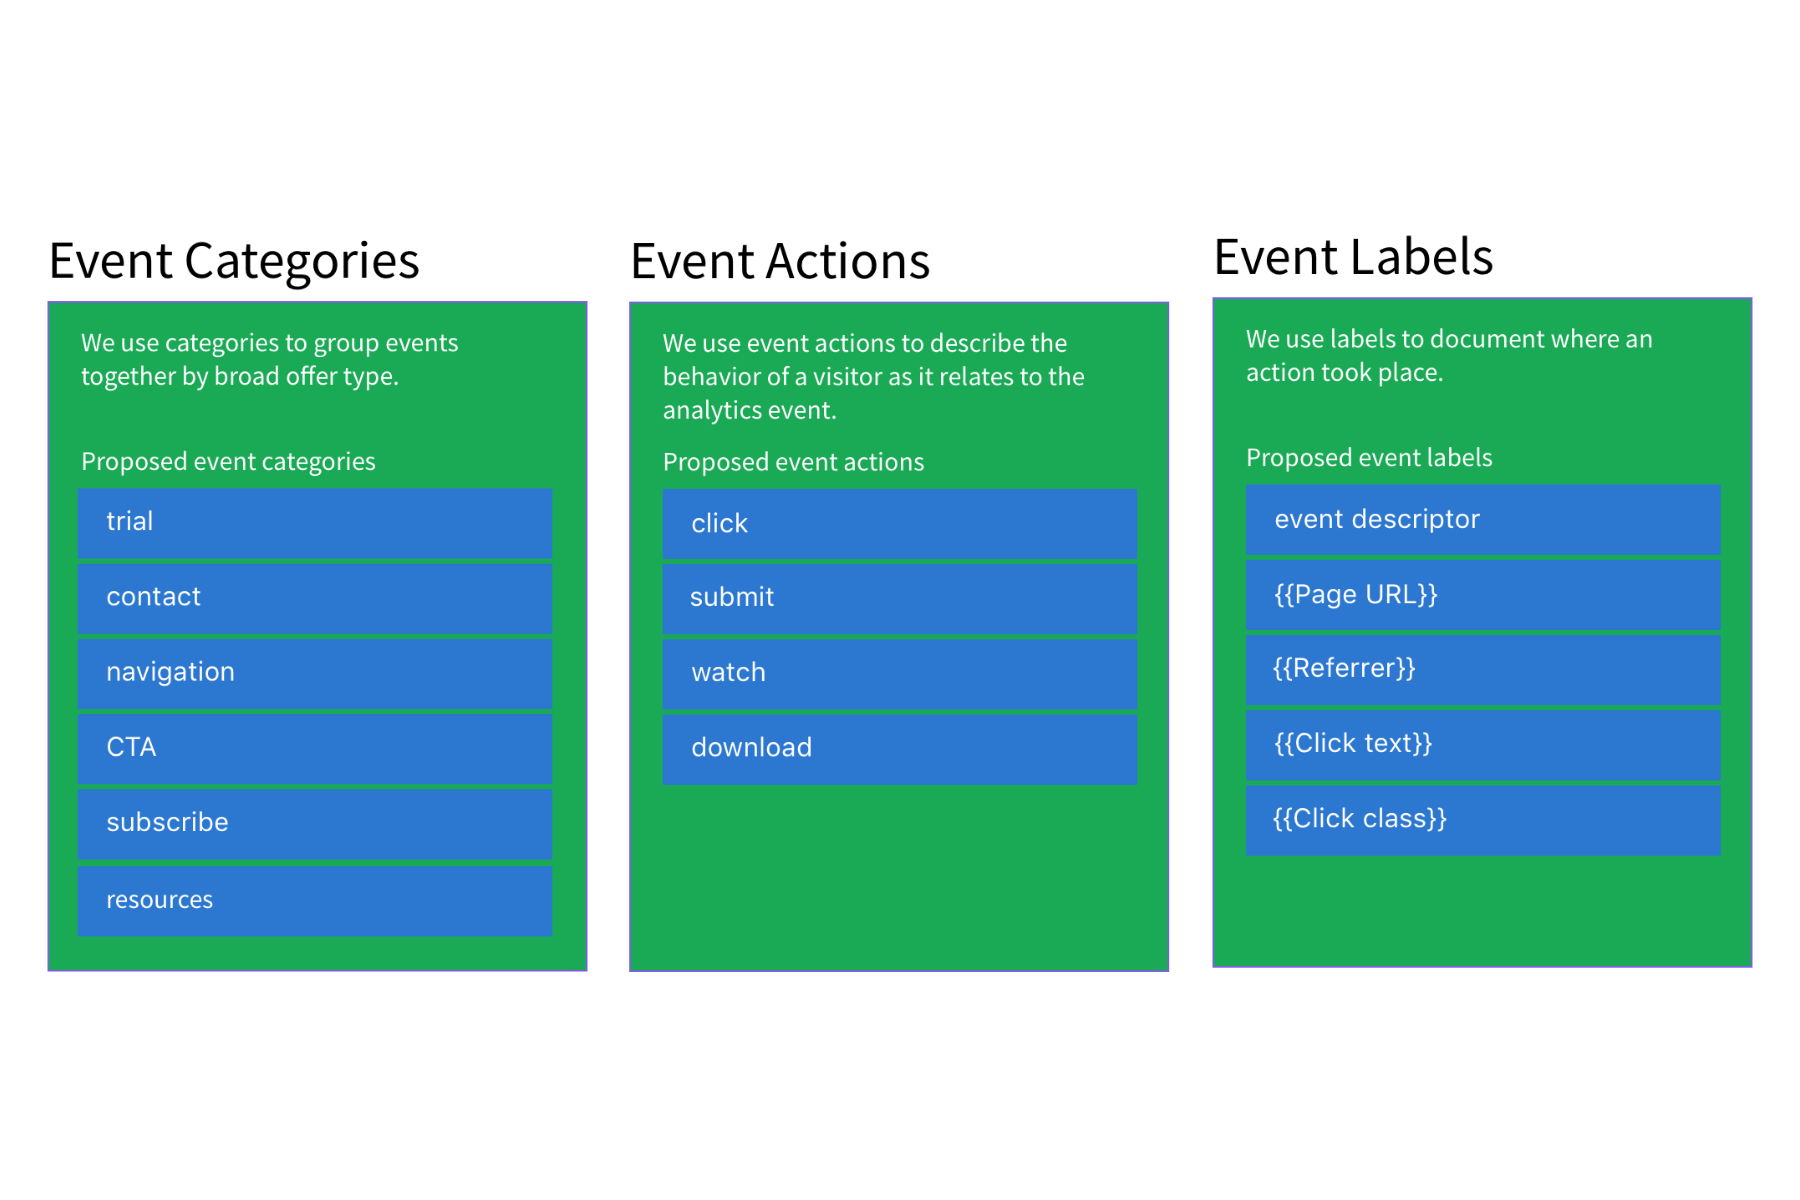
We needed a single format for all Google Analytics events on about.gitlab.com. Here's the plan I built for our event components.
Event categories describe how visitors choose to interact with our website.

Event actions describe what someone did in an event category.

Event labels add context to events. What page someone was on for an event, where they were referred from, the text they clicked on, click classes, and other data help us gather the details about how everything is working on our site.

With the details settled, it was time to update our container.

Burn it down
Trying to update the existing container would've been a nightmare and taken hours and hours to straighten everything out. Starting over was an attractive alternative to the tedious untangling process.
We needed to keep our existing Google Tag Manager container up and running, so I imported our existing container into a new test container. And immediately ran into a problem. There's not a simple way to delete all your Google Tag Manager elements. You have to go into each one, click a contextual menu, then select delete, and confirm you want to delete the element. That workflow would've taken too long, and I wanted an alternative.
A little Googling surfaced this great article on Analytics mania with an empty container you can import. Once the container was empty, I added the snippet to a local branch of about.gitlab.com and started creating and debugging new elements on my workstation.
Build it back up
Since joining GitLab in June, I've spent some time learning a basic git workflow to update about.gitlab.com. GTM includes a preview mode for debugging, which works on local versions of a site as well.
The process took some trial and error. This update needed to create a system pliable enough to adapt to small changes to any part of our website, and still give us details on how visitors interact with it over time. Here's an example of how we do this with call to action (CTA) buttons on our site. They go in the CTA category, the action is click, and the label pulls in data to help contextualize the CTA.
The tricky part was telling GTM when to fire this event. After digging through the CTA clicks in GTM Preview, I found a few common factors and created rules to cover those contexts.
Migrating to the new container
This was the simple part.
Step 1, export the new container into an XML file.
Step 2, import the empty container XML file to overwrite the existing container with a new version. I didn't publish this version because we would've lost data for how ever long it took to finish the next step. It should be quick, but safer to create a version, leave the published version alone, and move to step 3.
Step 3, import the new container XML. I published this one and checked about.gitlab.com with GTM Preview.
And the new container is live with zero downtime. I checked everything one last time and published an update to GitLab's handbook with the details of our new GTM system.
We've been using the new system for the last couple of months, and it has been smooth sailing. One neat tool I found is Simo Ahava's GTM Tools Add-on for Google Sheets. It creates an inventory so we can see the tags, triggers, and variables details in one view without extra clicks. It even syncs notes to make it much simpler to keep track of why we added each GTM component.